When I first got into dirt biking I roughly knew what the carburetor was and where to find it.
However, my full introduction to this mysterious device happened when my dirt bike showed sluggish performance and a friend of mine (who is a motorcycle mechanic) recommended that I clean the carburetor.
Here’s what I learned along the way.
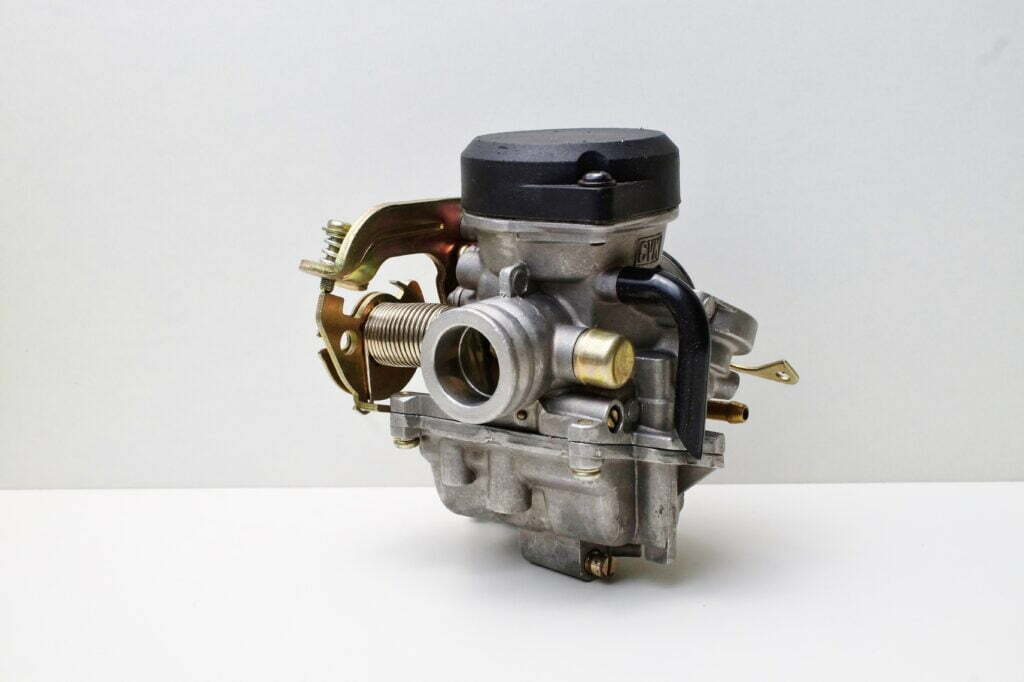
A dirt bike carburetor is a component that mixes fuel and air and delivers the mixture to the engine. It plays a crucial role in regulating the engine’s performance by controlling the amount of fuel and air that is delivered to the engine.
A properly functioning carburetor can help ensure that the engine runs smoothly and efficiently, while a dirty or poorly adjusted carburetor can cause engine problems.
Regular cleaning and tuning of the carburetor is important for maintaining the engine’s performance and longevity.
How does a dirt bike carburetor work
A dirt bike carburetor is a device that blends air and fuel in the correct proportions to provide the engine with a mixture that it can burn efficiently.
Below is a detailed explanation of how a dirt bike carburetor works:
- Air intake: Air is drawn into the carburetor through the air filter, which removes dust and other impurities. The air then enters the carburetor through a venturi, which is a narrow section that increases the air velocity and creates a low-pressure area.
- Fuel flow: The fuel is stored in a tank (here we are talking about the actual fuel tank) and is drawn into the carburetor through a fuel line. A fuel valve, also known as a needle valve, regulates the flow of fuel into the carburetor. The fuel is then mixed with the incoming air in the carburetor’s mixing chamber.
- Throttle control: The rider controls the engine speed by opening and closing the throttle, which is connected to a butterfly valve in the carburetor. When the throttle is open, the butterfly valve opens, allowing more air and fuel to enter the engine. When the throttle is closed, the butterfly valve closes, reducing the flow of air and fuel.
- Air/fuel mixture: The correct air/fuel mixture is achieved by adjusting the fuel valve, which is calibrated to deliver the correct amount of fuel for the amount of air entering the engine. This mixture is critical for proper engine operation, and the carburetor must be adjusted correctly to ensure that the engine runs smoothly and efficiently.
- Fuel metering: To ensure a consistent air/fuel mixture, the carburetor uses a fuel metering system, which measures the fuel flow and adjusts it based on the engine’s demands. This system is often adjustable, allowing the rider to fine-tune the carburetor for different riding conditions.
- Choke: Some carburetors also have a choke, which is a mechanism that enriches the air/fuel mixture when the engine is cold. The choke restricts the air flow, which increases the pressure in the mixing chamber and causes more fuel to be drawn into the engine. This helps the engine to start more easily in cold weather.
Here’s a great animation to visually show the principles of motorcycle carburetor operation:
Dirt bike carburetor diagram
Although every carburetor is a little bit different, depending on the dirt bike manufacturer and model, here is an exploded view of a Yamaha enduro carburetor.

For the exact diagram of your carb, I suggest searching online or consulting with your original user manual.
Where is a carburetor on a dirt bike
A carburetor is typically located on the engine of a dirt bike, near the air box.
It is typically mounted on the engine intake manifold, connecting the air filter to the engine.
On most dirt bikes, the carburetor is situated in a prominent location near the top of the engine, making it easy to access for maintenance and adjustments.
The exact location of the carburetor can vary depending on the make and model of the dirt bike, but it is typically located near the top of the engine, behind the front wheel.
Here is an example with a Suzuki dirt bike.

Dirt bike carburetor cleaning
Cleaning a carburetor on a dirt bike is an important step in maintaining the engine’s performance and longevity.
Although it might take you several hours to do this first time, cleaning your carb can fix issues with sluggish acceleration.
Here’s an overview of how to clean a dirt bike carburetor.
Preparation
Before cleaning the carburetor, make sure to have the following tools and supplies: screwdrivers, wrenches, carburetor cleaner, a small brush, a can of compressed air, and rags.
Remove the carburetor
The first step in cleaning the carburetor is to remove it from the engine.
This typically involves removing the air filter and the carburetor’s mounting bolts.
Be sure to keep track of the carburetor’s orientation and any vacuum lines or other connections to avoid confusion during reassembly.
Disassemble the carburetor
Once the carburetor is removed from the engine, disassemble it into its individual components.
This usually involves removing the float bowl, the needle valve, the pilot jet, and any other parts that are easily accessible.
Clean the parts
Using a small brush and carburetor cleaner, clean all the parts of the carburetor thoroughly.
Pay special attention to the passages, ports, and jets, which can become clogged with dirt and debris.
Clean all parts until they are free of dirt and grime.
Dry the parts
After cleaning the parts, use a rag to dry them thoroughly.
Then, use a can of compressed air to blow out any remaining debris.
Reassemble the carburetor
Once the parts are clean and dry, reassemble the carburetor, making sure to tighten all bolts and connections securely.
Personal advice: work on a clean bench because there are a lot of small parts that can easily get lost if your work space is cluttered.
Reinstall the carburetor
After the carburetor is reassembled, reinstall it on the engine.
Make sure to reconnect any vacuum lines or other connections that were disconnected during removal.
Test the engine
Once the carburetor is reinstalled, start the engine and let it warm up.
Pay attention to the engine’s performance, and make any necessary adjustments to the carburetor.
Check out this awesome video that explains dirt bike carburetor cleaning.
Dirt bike carburetor tuning
Tuning a carburetor on a dirt bike is an important step to ensure that the engine runs smoothly and efficiently.
Here’s a quick guide on how to tune a dirt bike carburetor.
Preparation
Before tuning the carburetor, make sure the air filter is clean and that there are no air leaks in the air intake system.
Also, ensure that the fuel is fresh and the fuel lines are not clogged.
Warm up the engine
Start the engine and let it warm up for a few minutes.
This will allow the carburetor to reach operating temperature and make the tuning process more accurate.
Adjust the idle
The first step in tuning the carburetor is to adjust the idle speed.
The idle speed is the speed at which the engine runs when the throttle is closed.
To adjust the idle, locate the idle speed screw on the carburetor, and turn it clockwise to increase the idle speed, or counterclockwise to decrease it.
Adjust the air/fuel mixture
To adjust the air/fuel mixture, locate the pilot screw on the carburetor.
This screw regulates the amount of fuel that is mixed with the air at low throttle settings.
To lean out the mixture, turn the pilot screw counterclockwise, and to richen it, turn it clockwise.
Adjust the pilot screw until the engine runs smoothly at idle.
Adjust the throttle
Once the idle is set and the engine is running smoothly, the next step is to adjust the throttle.
To do this, slowly twist the throttle while watching the engine’s RPM.
If the engine RPM increases smoothly, the throttle is properly adjusted.
If the engine stumbles or hesitates, the air/fuel mixture may be too rich or too lean.
In this case, adjust the pilot screw until the engine runs smoothly at all throttle positions.
Test ride
Once the carburetor is adjusted, take the dirt bike for a test ride.
Pay attention to the engine’s performance at all throttle positions, and make any necessary adjustments to the carburetor.
Final adjustment
Once the test ride is complete, adjust the carburetor as needed to ensure that the engine runs smoothly and efficiently.
This guy talks you through the main principles of motorcycle carburetor tuning.
Wrapping Up
In summary, a dirt bike carburetor blends air and fuel in the correct proportions to provide the engine with a mixture that it can burn efficiently.
The throttle control, air/fuel mixture, fuel metering, and choke are all critical components of the carburetor that work together to ensure proper engine operation.
Cleaning a carburetor on a dirt bike involves removing the carburetor from the engine, disassembling it into its individual components, cleaning the parts, reassembling the carburetor, and reinstalling it on the engine.
Cleaning the carburetor regularly can help maintain the engine’s performance and longevity, and can help prevent engine problems.
Tuning a carburetor on a dirt bike involves adjusting the idle speed, air/fuel mixture, throttle, and pilot screw to ensure that the engine runs smoothly and efficiently.
It is important to take your time and make adjustments gradually to avoid over-adjusting the carburetor and causing engine problems.
If you are unsure about tuning or cleaning the carburetor, it is best to seek assistance from a professional mechanic.
Best of luck with your carb, and safe riding!