Back in the day, I remember researching how to keep track of my dirt bike’s maintenance without doing it manually. I remember discovering a gadget called an hour meter and wondering how does an hour meter work on a dirt bike.
An hour meter keeps track of the dirt bike’s total running hours. It uses electrical pulses from the bike’s spark plugs or vibrations from the bike while the engine is running to count the running hours. Hour meters usually have an LCD screen showing current and total running hours of the dirt bike.
What’s an hour meter
An hour meter is an aftermarket accessory for dirt bikes used for keeping count of your total driving miles and hours, mainly for maintenance purposes and tracking warranty applications.
Keeping track of your maintenance intervals using the hour meter is usually for maintenance duties such as:
- Tracking the time it takes to change oil or transmission fluids
- Checking and adjusting valves, especially for diesel engines
- Checking if there’s a need for an engine overhaul
- Cleaning the air filter regularly
- Replacing piston rings
- Lubricating the drive chain at regular intervals
While it’s an optional accessory, many riders opt to install an hour meter on dirt bikes to be on the safe side of maintaining their ride, especially for four-stroke machines, dirt bike racing motors, and ATVs. The device also makes it easier to tally your riding hours in your maintenance manual, especially for parts with separate service lives like fluids.
How does a dirt bike hour meter work?
There are two types of hour meters for dirt bikes: wired and wireless.
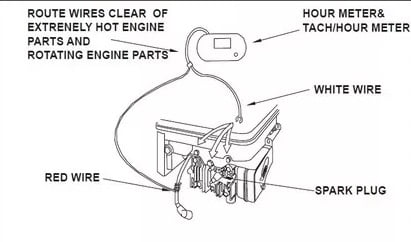
Photo credits: Runleader
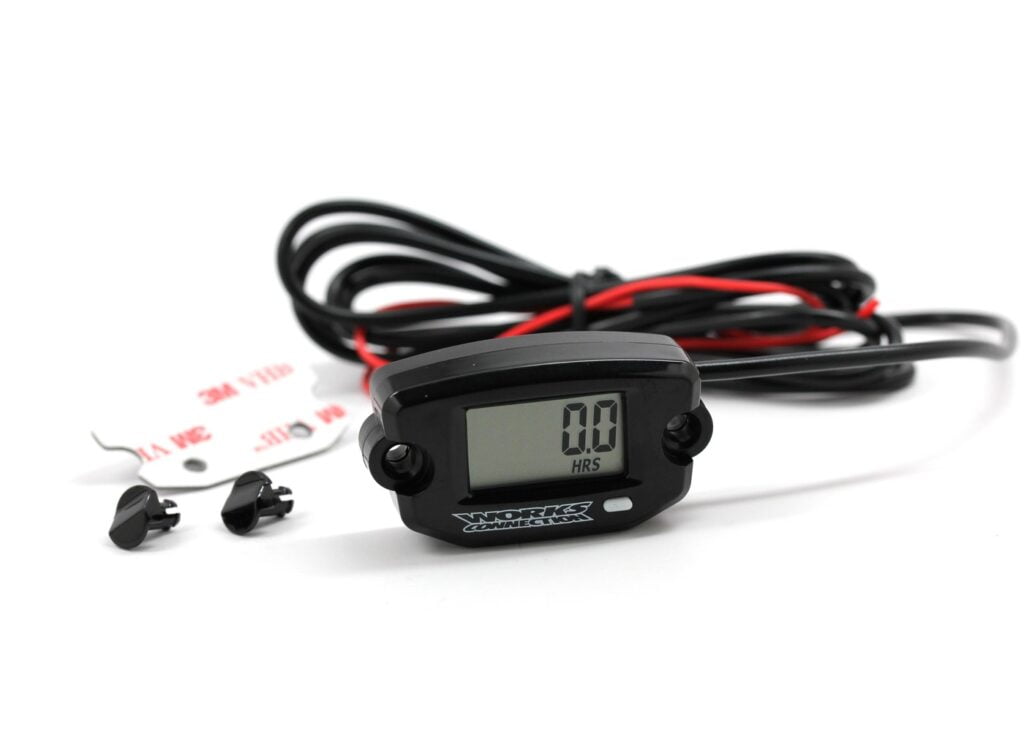
A wired hour meter keeps track of your running time through electrical pulses or signals triggered by the engine’s spark plug. The electrical signals trigger the external lead wrapped around the engine’s spark plug wire when the engine is running, which sends signals to the wiring connected to the hour meter.
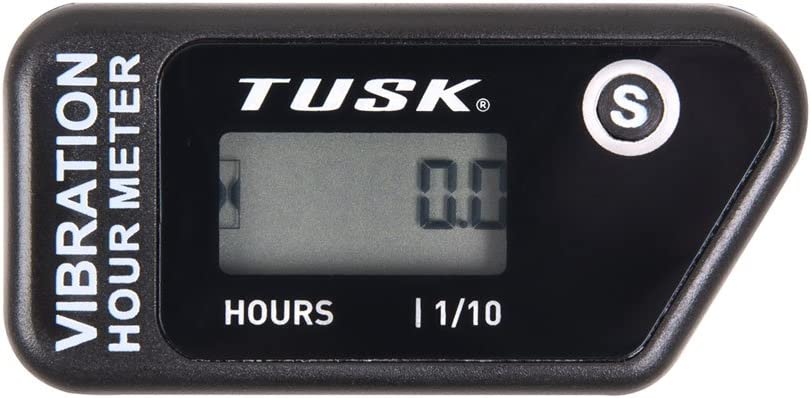
A wireless hour meter, on the other hand, relies on the vibrations from your engine to provide a reading of your total miles and driving hours. Every time you turn on the ignition, the wireless meter runs and tracks your running time.
Most riders are divided on which type of hour meter works better.
Some say the wired hour meters provide a more accurate reading since their electrical pulse source is connected directly to the spark plug. Some have complained about the inaccuracy of wireless meters because of false triggering (especially when your bike is idling) or malfunctioning while driving. Others prefer wireless due to its convenience.
Consider the wired meter if you don’t mind having an accessory connected to your spark plug. However, if you prefer an hour meter that you can transfer anywhere on your dirt bike, then choose the wireless one.
How to install an hour meter on your dirt bike
Installing a wired hour meter
1. Find the most suitable area on your dirt bike to install your hour meter
You can install your wired hour meter anywhere you see fit, but the safest and most recommended areas are:
- The frame of your dirt bike
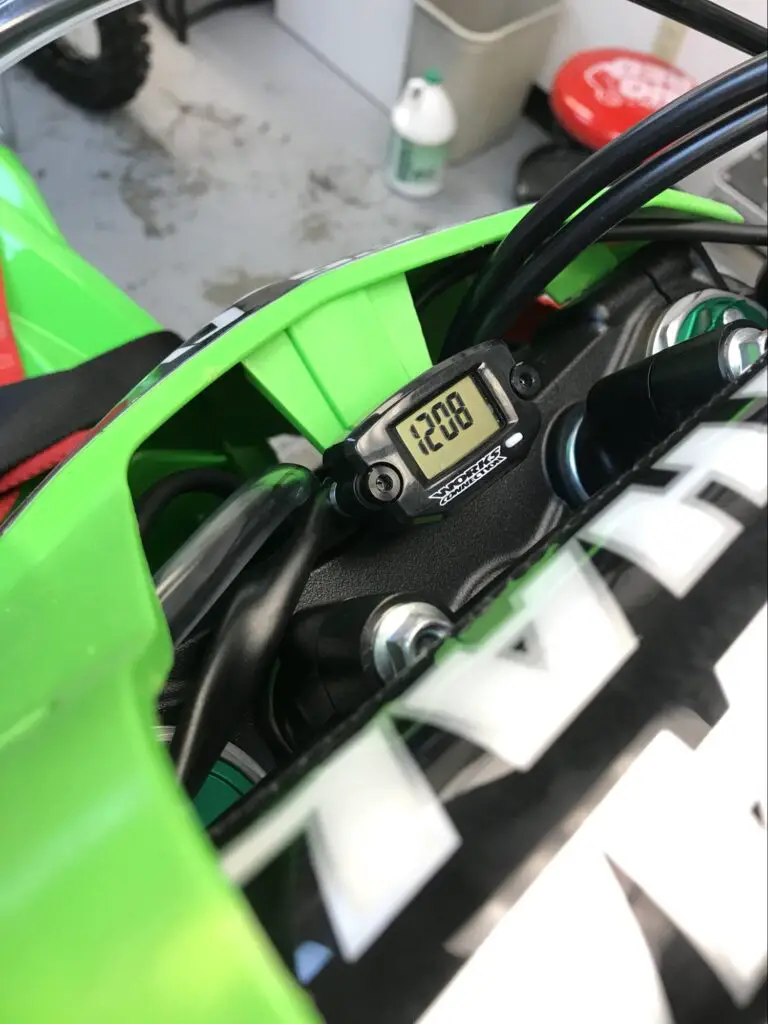
- Upper triple clamp
- Under the seat or the subframe where the device will have extra protection
To prevent damage, do not install it near an area that reaches 70°C or 158°F, such as an exhaust pipe.
2. Ensure the surface is free of moisture
Since we’re talking about electrical pulses and wires here, it’s critical to ensure your surface is dry and free from any source of potential damage. To be sure, wipe the surface clean and dry before you proceed with the installation.
3. Wrap the cable around the spark plug
If your bike comes with a coil/plug, wrap the wire inside the coil area at least five times. You can put a drop of silicone at the end of the wrapped wire to avoid moisture damage.
If your bike has a separate spark coil and plug, wrap the cable of your hour meter around the ignition cable and secure it with electrical tape.
4. Secure the other end of the cable
Once your cable’s secured on the other end, run it around your dirt bike’s frame until it reaches your hour meter’s display screen. Attach the other end of the cable to the slot in the back or corner section of your hour meter.
5. Mount the hour meter device on your bike
When securing your hour meter and the cables, you can use adhesives like double-sided or electrical tape, a mounting kit (if your device comes with a kit), or silicon glue.
Once done, take your dirt bike with your new hour meter for a test drive and see if the device works.
Installing a wireless hour meter
A wireless hour meter has almost the same installation process as a wired one apart from the cable part.
1. Find a suitable area to install your wireless hour meter and clean it
You can check out the recommended surfaces I mentioned in step 1 of installing a wired hour meter.
Once you find the most suitable area, clean it and make sure it’s dry and flat. You can use your regular cleaning solution, dishwashing liquid, or acetone to clean the application surface.
2. Test the device before mounting it
To test your wireless hour meter, turn on your engine, let it run idle, and hold your device in your chosen area by firmly pressing it with two fingers. If it’s working, it will take the vibrations of your engine as a signal to boot up and start counting.
In case the hour meter fails to turn on or keeps blinking, contact your dealer or manufacturer.
3. Mount the device on your bike
Remove the protective film from the adhesive at the back and attach the device to your dirt bike. You can also secure the device with cable ties for added protection.
4. Take it for a test drive
Go ahead and take your dirt bike for a ride to test the counting accuracy of your hour meter.
Tip: If you’re using a wireless hour meter, take the results with a margin of error. They can be sensitive, and the device might take a slight vibration as an addition to your running time.
Wrapping up
An hour meter is a convenient aftermarket accessory for your dirt bike that helps you keep track of your total miles and running hours so you can monitor maintenance intervals. The hour meter keeps count of this by working on signals from electrical pulses from the spark plug or the vibrations of your dirt bike.
There are two types of hour meters on the market – wired and wireless. A wired hour meter has a cable wrapped around the spark plug or the ignition cable. While a wireless hour meter counts your running hours by detecting vibrations from your bike.
The reviews about the efficiency of these two varieties are mixed, so it will all come down to your preference. A wired hour meter seems to provide a more accurate reading, while a wireless hour meter focuses more on the convenience of placement.